Monday, March 14, 2016

An Ode to Silas

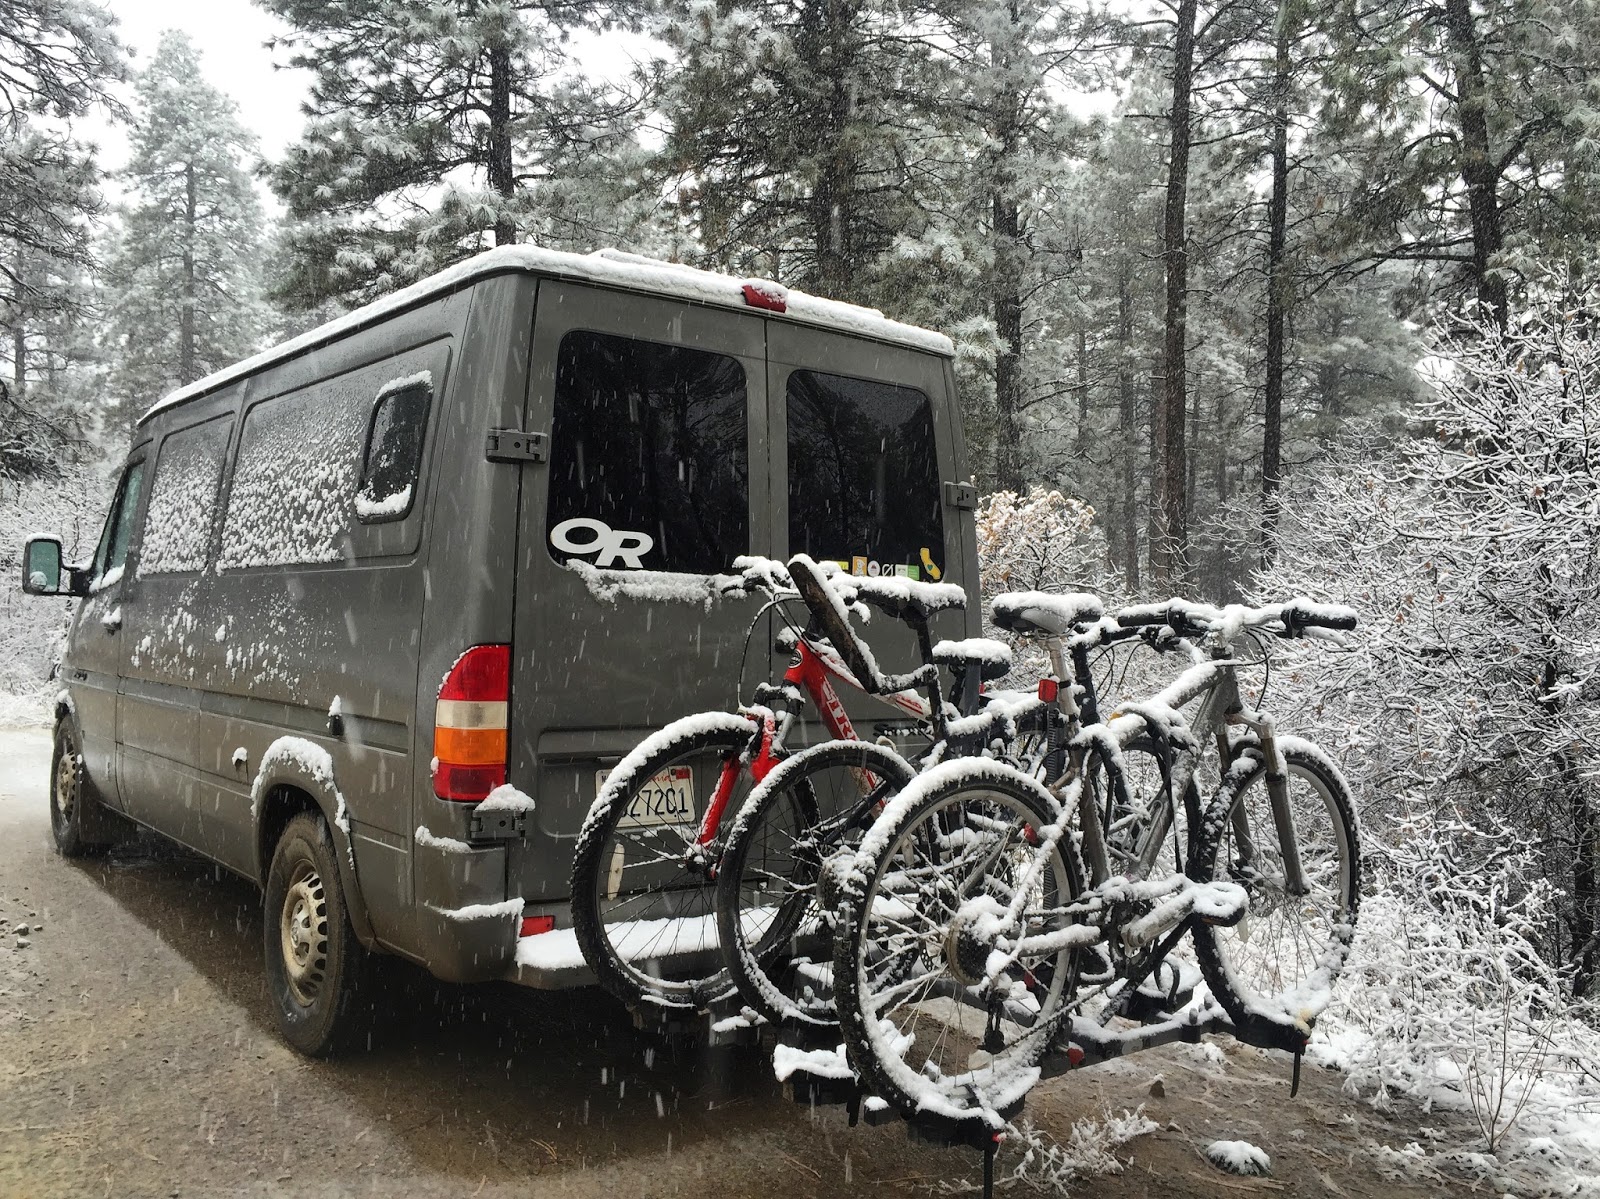
As most are aware, I sold Silas a few weeks ago.  It was SUPER SAD.  I actually had to try pretty hard not to cry when he drove away with his new owners.  The only thing that made me ok with it is that he went to an awesome home with an adventurous couple who has already taken him to Yosemite several times as well as the Eastern Sierras.  I know he will enjoy his new life and bring his new peeps as many adventures as he brought me.  Here is an ode to my beloved van:

Silas

You came in to my life at a difficult time
You were there to excite and distract me in a time of sadness
Building you and planning adventures lifted my spirits during a dark time

During our first trip together, we bumbled down dark dirt roads
trying to figure out the headlights, getting stuck in a big rut and spinning our wheels
and freaking out when warning lights came alight on the dash

Each time we set out, I fit better in the seat
and a giant cargo van became an extension of my body
seamlessly maneuvering down the highway to the next destination

You became a home for me and my best friend and my pups
You acted as our shelter, our transportation, movie theater, kitchen, and library
we set out to do whatever our imaginations came up with and you were the one to take us there

There were times of frustration
when it seemed like all you wanted to do was break
But then you came back to life and powered us up the next hill

The familiar smell of melting crayons that comes from your cockpit
became a lovely welcome home.
For a while, you even welcomed a family of mice home, that wasn't so good.

One day, you drove past a kayaker
I rolled the window down and asked if he wanted to hop in
He did.  And then we fell in love.  Thanks Silas, I owe you big time for that one.

You brought me so much happiness
and a life I had only dreamed of before
became my reality

Some people see you as just an old van
But I see you like an old friend
So thanks for everything.

I'll miss you.

AK
UT
Yukon Territory
UT 
CA
UT
CO 
UT
British Columbia
CA 
MT
WA
OR
NV
ID
WY
UT
WY 
WA 
British Columbia
AK
AK


Promaster Build- Insulation and Partial Siding

The next step after doing our floor was to begin insulation and siding on the van.  Again, we are going slightly out of order because of the timing and geographical locations of our build.  It might be more logical to do the electrical first, and we would have liked to cut the holes for our fan and windows first, but it has been raining and snowing, so we waited on that.

Materials:
2 rolls 2' x 25' Reflectix
1 roll 48" x 10' Reflectix
2 packages UltraTouch Denim Insulation (R13)
1 package 4mm plastic vapor barrier
1 4'x 8' sheet 1" Thermasheath Rmax Foam Insulation Board (better R-value than regular R-Tech foam board that we used on the floor)
2 cans 3M spray adhesive
2 rolls Gorilla tape
2 sheets 4' x 8' Tri-ply underlayment plywood
Some screws

Time:
Ehhh, maybe two full days worth?

Cost:
If I get less lazy, I will calculate this later!

Steps:
1. Reflectix!  Reflectix is basically bubble wrap with foil on either side of it.  It is a good insulator and vapor barrier, easy to cut and work with, and not that expensive, so I didn't see any good reason not to put it everywhere.  We cut shapes to fit all the various spaces in the van and spray adhesived them on.  If you're building a Promaster, be prepared to be wowed by all the ridiculous shapes and blobs all over the van; there are almost no straight lines.  We popped off the factory panels on the doors and Reflectixed behind those too.  After you're done the van will look like a sweet spaceship.  If you're using spray adhesive you'll want to make sure to have good ventilation and wear a face mask.
Working into the night
Turning into a space ship
Shiny!
2. Denim insulation.  I used this in Silas and really liked how easy it was to work with.  It cut down on sound/road noise a great deal as well as obviously keeping the van warmer in winter and cooler in the summer.  Ripping the denim and stuffing it in crevices creates a lot of denim dust, so you will want to again wear a mask and have ventilation in the van.  Having a vacuum or broom and intermittenly cleaning up during this process will make things happier.  On the large panels, we put a bit of spray adhesive and then stuck up square pieces.  We would cover large areas with duct tape to help hold the big pieces in place.  You will also want to stuff all the nooks and crannies and crevices- of which there are many!  I like using a long flat head screwdriver to jam bits of insulation in.  We used denim on all the walls and doors.  I used it on the ceiling in Silas because it has a better R-value than other materials but it was such a huge pain that I decided not to do that this time.  One more note on the denim- they used to carry it at Home Depot and you could buy it by the package- that's what I did last time, but now you can only order it by the pallet (which is way too much!)  I was able to get it at Lowe's in the quantity I wanted.

A really easy, mostly square section
Taping in large pieces to keep them in place
3. Vapor barrier.  We wanted to make sure our denim was protected from any moisture.  The Reflectix on one side protects it from outside the van moisture and condensation and on the inner side we covered it with a plastic vapor barrier.  This is pretty simple, just requires lots of tape and some scissors.

Starting in on the vapor barrier.
4. Ceiling.  As I said above, trying to use denim on the ceiling was really hard and annoying, so I opted for foam board this time.  We found a type board with R-6, which is better than the R-Tech board I've used in the past.  We used 1" but in retrospect I wish we would have gone with 3/4" because it sticks down just a bit below the cross beams in the van.  We used a knife to cut squares that fit in between all the roof ribs.  For now, we left off the square where the Fantastic will go so we wouldn't have to cut through it later.  We spray adhesived (sense a theme?!) them on and we put up temporary furring strips across the boards to hold them on while we drive around without our wood paneling on.  We got the feeling they might pop off otherwise.

Ceiling insulation going in.
5. Siding.  During this step we also put up wood siding where all of our cabinets will go.  This siding will essentially be the back of the cabinets, and because it will be covered, it doesn't have to look perfect (which is good because as I said before, the shapes in this van are unreal).  For the rest of the walls, we will do tongue and groove paneling.  We used 3mm (I think.  I'll have to double check on this) underlayment.  We painted it with a waterproofing stain before mounting it to add an extra layer of moisture barrier.  We used a combination of circular saw and jigsaw to cut the shapes to match the walls and screwed them in.
A couple of panels up.  The rear one will be under the bed, the one closer to the front will be the back of the kitchen cabinet.  The un-Reflectixed portion above it is where one of our windows is going.
IGNORE THE BED..  No really, please don't look at our sketchy temporary bed platform.  This picture is to show you more siding and the strips along the ceiling to hold our insulation in.  Obviously if we were putting our actual ceiling in before going on a 3,000 mile road trip this wouldn't be necessary.
Alright!  Next stage of the van complete!  We are looking forward to having a well-insulated van.  


Wednesday, February 17, 2016

Promaster Build- Floor

Today we put the floor into the Pedro.  We decided to do the floor first because we will be doing most of the build after ski season in April down at my brother’s house where we will have a smart engineer, lots of tools, and warm sunny weather at our disposal, but we need the van to be usable in the mean time and the dogs wouldn’t be able to ride in the van with the bare metal floor (how’s that for a run on sentence).  So, the floor was our priority.  Everything went really smoothly!  Here’s what we did:

Materials:
2 rolls of 10’ x 4’ reflectix ($21 each)
1 roll of Gorilla Tape ($5.50)
1 can 3M spray adhesive ($11)
2 sheets of 8’ x 4’ .5" foam board ($7.45 each)
1 sheet 12’ x 6’ plastic vapor barrier ($6)
3 rubber horse stall mats 4 x 6’ ($39.99 each)
2 wood strips .5” x 8’ ($8.99 each)
1 metal door frame threshold ($13.99)

Time:
5 hours

Cost:
$222.34

Steps:

1. Relfectix.  Reflectix is like magic!  I plan on covering the whole van with it.  It’s a great insulator.  We used spray adhesive and cut reflectix to fit the whole floor and the wheel wells.  We got it all stuck down and used Gorilla tape between all the separate pieces.  We were able to cover all the space with 2 rolls of 10’ x 4.’  It was about 40 degrees outside while we put the floor in and the metal was quite cold on our feet.  Once we put the reflectix down it was noticeably warmer, and a perfectly comfortable temperature to stand on in just our socks. 

I've seen some people put little wood strips in between the ridges on the floor to make the whole thing more level.  We opted not to do that to save some more time and money.
All the reflectix is glued in and all the seams are covered with Gorilla tape

2. Foam board.  Next we cut our foam board to shape.  We again used tape between all the seams.  I chose 1/2 inch foam board because that seemed plenty sufficient given all the layers we would eventually have on the floor.  We were just shy on having enough with the two sheets that I bought, so we will have a little gap to fill in when we buy more foam board for the ceiling. 


3. Vapor barrier.  I’m pretty sure this wasn’t necessary but I had it and decided to throw it down just in case our top layer wasn’t 100% waterproof.  We cut the plastic a little larger than the floor space so it came up the walls a bit around all the edges and then trimmed it down once we had our top layer in.


4. Horse mats.  We chose to use rubber mats because hardwood is too slippery for the dogs, the rubber seemed like it would not only insulate well but also be a great sound dampener, it would be easy to clean and it wouldn’t be a problem to get into the van with wet clothes or gear.  We bought our mats at Tractor Supply Co.  They come in 4’ x 6’ rectangles, which was great because the van is 12’ x 6’ so three mats covered the space perfectly.  The mats are heavy enough that they lay perfectly flat and don’t curl or move around, and there is no gap in between the pieces.  We trimmed them with a utility blade, which was hard work, but we got nice curves around the wheel wells and other features of the walls. 

The mats are dirty because we have already been using them in the van.
5. Doorways.  Because we didn’t frame the floor with wood or use a solid sheet of plywood before our mats, we wanted to make sure that our foam board wouldn’t get crushed on the edges when we stepped into the van.  We used .5” wood strips along the back door and the side door to reinforce the edge of the floor.  This went under the rubber mats, above the relfectix, and as a side edge to the foam.  For the side door, we also added a metal threshold, which we screwed into the wood strip to protect the edge further.

Layers.  The wood strip keeps us from crushing the edge of the foam when we step into the van.
Here's what all the layers look like from the side.  The foam board is behind the wood strip.

Here is the metal threshold which hides everything and makes it look clean as well as protects it.
The project was really fun!  The floor feels really comfortable to stand on and we expect it will insulate very well as well as quiet things down significantly in the van.  The van is about 6’5” inside, so we didn’t have to worry much about having our floor or ceiling insulation too thick.  All in all the floor was a little under 1.5” thick.  


Tuesday, February 16, 2016

For Sale

The time has come to sell Silas.  It is very bittersweet.  He is all smogged and had his oil changed and I cleaned him all out.  Here is the link to the Craigslist ad if anyone is interested.  I hope he goes to a good home and makes someone as happy as he made me!


Friday, February 12, 2016

Identity Crisis

Help!  As many of you know, I recently purchased a new van (Pedro the Promaster) and I am planning to sell Silas.  Silas the Sprinter has really become part of my identity over the past few years.  All of my friends and many people I haven't met know the van by name, I have some loyal Instagram followers, I am referred to as Silas the Sprinter in my guest blogs on various sites, and Silas is linked to in tags and references (he was even recently mentioned in Cosmo Magazine!).


So that begs the question: What happens when I sell Silas?  I realize that this is extremely trivial, but I don't care, I'm asking anyway.  Do you think I should:

1. Keep the Instagram handle @silasthesprinter and the blog name (I actually bought the domain silasthesprinter.com last year, but haven't had a chance to build that site yet).  As Silas was the inspiration and the foundation for this lifestyle, I could keep the names as they are as an homage to the van that started it all.  But, this could be confusing because I won't own a Sprinter any more and people may wonder why is she called Silas the Sprinter when she drives a Promaster, is she confused about what type of van she has?

2. Keep the same Instagram account but change the named to PedroThePromaster (I'm pretty sure you can change your Instagram name without creating a new account?).  This would mean those interested in continuing to follow the journey in Pedro would not need to follow a new account, but it would also mean everything tagged or linked to Silas on Instagram would now come up as "user not found."


3. Start all new accounts for Pedro.  Start from scratch with the new van.  Kind of not as thrilled about this option, but it is still an option.

What do you think?

Friday, February 5, 2016

A New Van to Call Home

After much consideration, debate, research, and pondering, I have purchased a new van to call home.  The new van, Pedro the Promaster will become the full time residence of Brian and me.  Silas is a wonderful van and is still driving fantastically, but there were a few things that tipped my decision in favor of a new van rather than keeping Silas for the remainder of his life.  These things were:

The new wheels.  Purchased from the dealer with 17,000 miles
1. Head room.  Silas is not a tall top Sprinter, and as such not many people can stand in him.  At 5'4" I can just stand fully if I'm not wearing shoes.  Chelsea is the most accommodating person ever and was nice enough not to complain about the fact that she had to stand with her neck crooked the whole time we lived in the van together.  After I acquired an amazing boyfriend last year (Brian) who is taller than Chelsea and even more uncomfortable trying to stand inside the van, I decided that for the happiness of everyone who is in the van, a taller roof would be ideal.  This is also good for adding a ton more storage space in the form of overhead cabinets.

2.  Front wheel drive.  Silas is rear wheel drive, which really proved to be a problem this winter.  Just getting through small amounts of snow or ice while going up driveways and in and out of parking lots was creating problems (as in spinning the wheels and being stuck).  No other similar van offers front wheel drive except the Promaster.  I think this was the single most important and deciding factor in choosing the Promaster above other options, like the Ford Transit, which we were pretty set on getting for awhile.  The 4WD Sprinter wasn't really a considerable option because of the cost of ownership (see #3) and the purchase price.

Pedro proved himself right off the bat in the snow at the Pole Creek Trailhead this weekend
3.  Cost of ownership.  Sprinters are very expensive to own and maintain.  There is no getting around this.  Fortunately they have nice engines and are known to drive well into 300,000+ miles, and they are of course, really nice and high quality vehicles.  Because we will be living in a van as our only residence for the forseeable future, it was determined that it would be good to have a van that was less costly to repair and maintain.  As I sit and write this in a sandwich shop, Silas is getting a $230 oil change, which is a totally standard price to pay for such a common and necessary thing on a Sprinter.

For now, Pedro is an empty shell (besides pups, ski gear, and hammocks as pictured here) but the build will begin soon
Eventually it was decided and the new van was purchased.  I cannot wait to begin the build out process to create my new dream home.  I am looking forward to sharing this space with the love of my life, with my friends, with Titan and Star, and whoever else might come along for a ride!  Here are the specs on the new van:

Ram Promaster 3500
Diesel Engine
159" WB
High Roof

If you have any questions about my experience as a Sprinter owner, the decision to get a Promaster, my thoughts on the Promaster so far, or anything else about van life, please don't hesitate to ask!